Hormone & Small Molecule ELISA Kits
8-OHdG / 8-Hydroxydeoxyguanosine ELISA Kit
- SKU:
- UNFI0029
- Product Type:
- ELISA Kit
- Size:
- 96 Assays
- Sensitivity:
- 0.281 ng/ml
- Range:
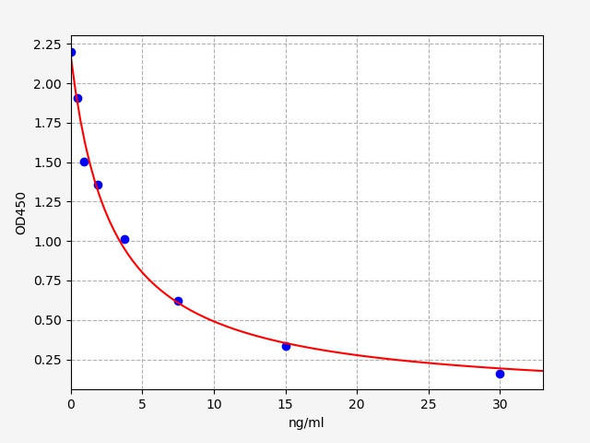
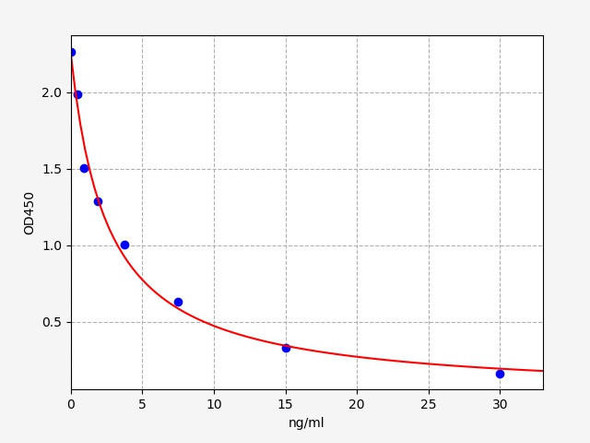
- 0.468-30 ng/ml
- ELISA Type:
- Competitive
- Synonyms:
- 8-OHdG, 8-Hydroxydeoxyguanosine
- Reactivity:
- Universal
Description
8-OHdG ELISA Kit
Urinary 8-OHdG is a biomarker for oxidative damage, cancers, diabetes and heart disease. The Assay Genie 8-OHdG ELISA Kit has been validated in urine and comes with extensive validation data including Spike-recovery, Range and Linearity. Furthermore the 8-OHdG ELISA is one of the most sensiteve kits on the market to date, allowing researchers to forgo the laborious separation and isolation steps of HPLC and detect low levels of 8-OHdG across any species.
Key Features
| Save Time | Pre-coated 96 well plate | |
| Quick Start | Kit includes all necessary reagents | |
| Publication Ready | Reproducible and reliable results |
Overview
| Product Name: | 8-OHdG (8-Hydroxydeoxyguanosine) ELISA Kit |
| Product Code: | UNFI0029 |
| Size: | 96 Assays |
| Target: | 8-OHdG |
| Alias: | 8-OHdG, 8-Hydroxydeoxyguanosine |
| Reactivity: | Universal |
| Detection Method: | Competitive ELISA, Coated with Antibody |
| Sensitivity: | 0.281 ng/ml |
| Range: | 0.468-30 ng/ml |
| Storage: | 4°C for 6 months |
| Note: | For Research Use Only |
Additional Information
| New Column | ||||||||||||||||||||||
| Recovery | Matrices listed below were spiked with certain level of 8-OHdG and the recovery rates were calculated by comparing the measured value to the expected amount of 8-OHdG in samples.
| |||||||||||||||||||||
| Linearity: | The linearity of the kit was assayed by testing samples spiked with appropriate concentration of [ANALYTE] and their serial dilutions. The results were demonstrated by the percentage of calculated concentration to the expected.
| |||||||||||||||||||||
| Intra-Assay: | CV <8% | |||||||||||||||||||||
| Inter-Assay: | CV <10% |
Protocol
*Note: Protocols are specific to each batch/lot. For the correct instructions please follow the protocol included in your kit.
Equilibrate the TMB substrate for at least 30 min at 37°C beforeuse. When diluting samples and reagents, they must be mixed completely andevenly. It is recommended to plot a standard curve for each test.
| Step | Procedure |
| 1. | Set standard, test sample and control (zero) wells on the pre-coatedplate respectively, and then, record their positions. It isrecommended to measure each standard and sample in duplicate. Washplate 2 times before adding standard, sample and control (zero) wells! |
| 2. | Add Sample and Biotin-detection antibody: Add 50µL of Standard, Blank or Sample per well. The blankwell is added with Sample Dilution Buffer. Immediately add 50 µL of biotin-labelled antibody workingsolution to each well. Cover with the plate sealer provided. Gently tap the plate to ensure thoroughmixing. Incubate for 45 minutes at 37°C. (Solutions are added to the bottom of micro-ELISA platewell, avoid touching plate walls and foaming). |
| 3. | Wash: Aspirate each well and wash, repeating the process three timesWash by filling each well with Wash Buffer (approximately 350µL)using a squirt bottle, multi-channel pipette, manifold dispenser orautomated washer. Complete removal of liquid at each step is essentialto good performance. After the last wash, remove any remaining WashBuffer by aspirating or decanting. Invert the plate and pat it againstthick clean absorbent paper. |
| 4. | HRP-Streptavidin Conjugate(SABC): Add 100µL of SABC workingsolution to each well. Cover with a new Plate sealer. Incubate for30minutes at 37°C. |
| 5. | Wash: Repeat the aspiration/wash process for five times. |
| 6. | TMB Substrate: Add 90µL of TMB Substrate to each well. Coverwith a new Plate sealer. Incubate for about 10-20 minutes at 37°C.Protect from light. The reaction time can be shortened or extendedaccording to the actual color change, but not more than 30minutes.When apparent gradient appeared in standard wells, you can terminatethe reaction. |
| 7. | Stop: Add 50µL of Stop Solution to each well. Color turn toyellow immediately. The adding order of stop solution should be as thesame as the substrate solution. |
| 8. | OD Measurement: Determine the optical density (OD Value) of each wellat once, using a microplate reader set to 450 nm. You should open themicroplate reader ahead, preheat the instrument, and set the testing parameters. |
View AllClose


